My workflow of vignetting correction
Introduction
Every lens at every aperture suffers more or less from light fall off from center to the borders
(edges) of the image. The bigger the aperture (smaller value), the bigger is this effect.
When viewing a single image, we do not notice this effect, but when stitching some images in one or more rows,
vignetting becomes noticable especially in regions of low structure, e.g. the blue sky.
The following example shows the upper part of a mosaic, stitched of 374 single images, taken in 17 rows, 22
images each, with F=11. Even in the mosaic with no enhancements applied, the effect of vignetting is visible and unacceptable.
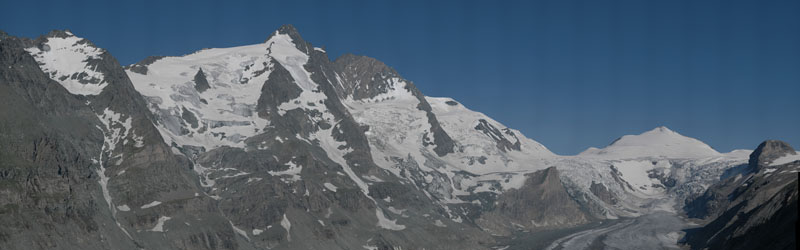
Without correction of vignetting
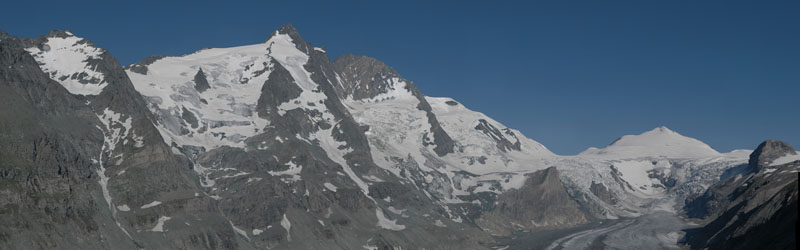
With correction of vignetting
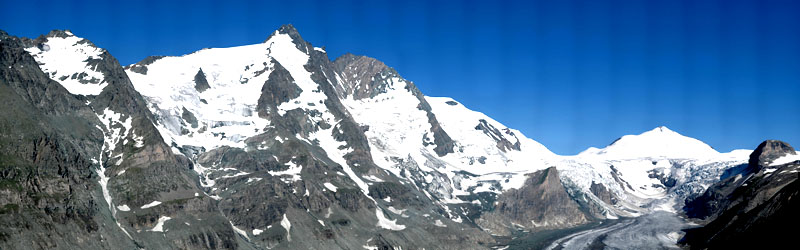
Without correction of vignetting - contrast strongly enhanced
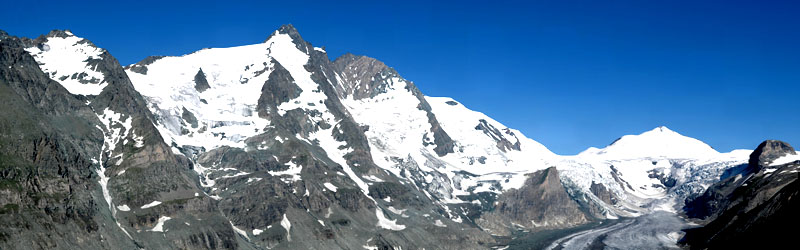
With correction of vignetting - contrast strongly enhanced
I found out that the light fall off neither is linear nor it is centric in most cases.
So my method works with a special mask for the correction of every (camera +) lens at every focal length and aperture.
These masks must be created once and then can be used in the correction process.
I hope, that my description is free of errors and you can understand it.
Please feel free to mail me, if you found an error, cannot understand something, if you know any improvements, to correct my english or whatever you want to comment.
Send E-mail to 
Description of workflow
As I almost never use RAW modus when I shoot a panorama, this workflow is based on JPEG images, but will work when applied after
RAW conversion as well.
Taking the test shots
To create the masks, I thought it would be a good idea to take shots of a very evenly lit object.
But this ideal object is hard to find. Tests with white and grey walls failed, just like photos of the blue or
totally overcast sky. All these objects are not evenly bright, at least for wide angle lenses.
What finally worked for me was a piece of 2mm thick white acrylic glass. I bought it at an acrylic glass store,
it costs almost nothing. Maybe you can get it also at the glazier, or a piece of white opal glass also is fine
(I didn't test that).
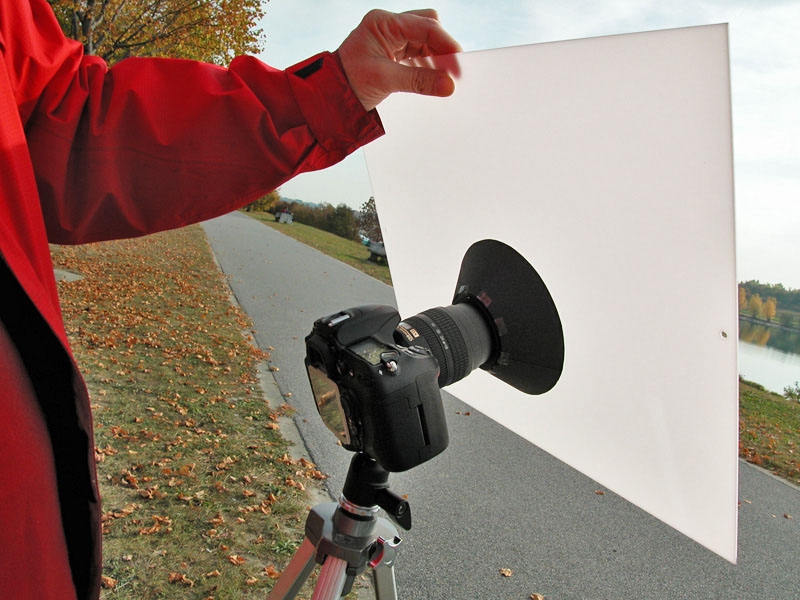
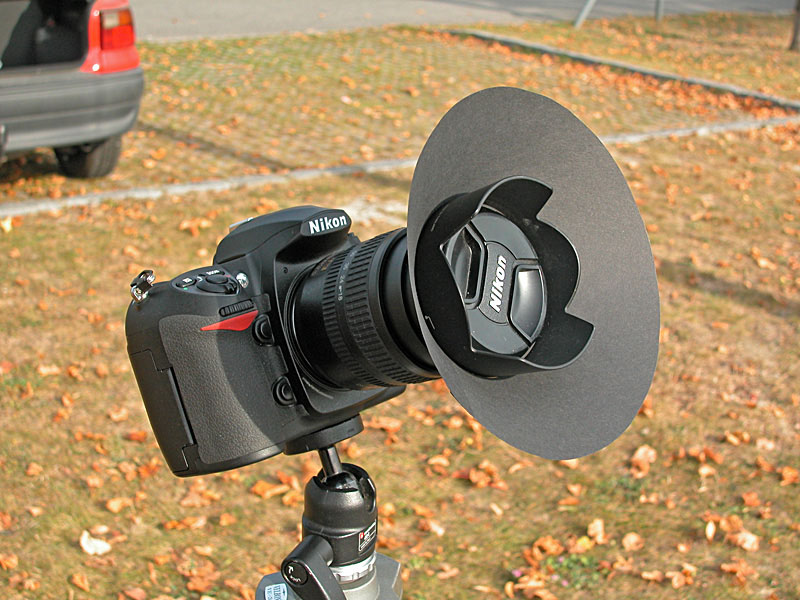
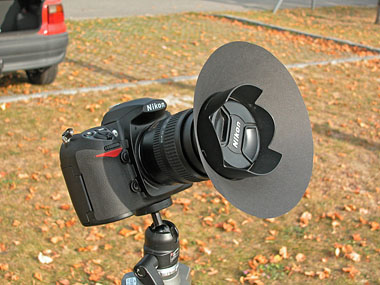
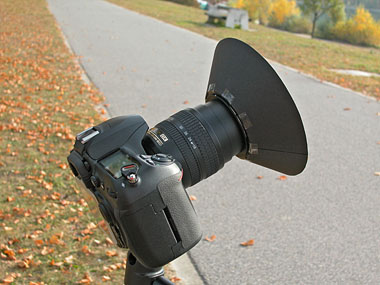
As shown in the picture below, I mounted the camera on the tripod, pointing directly towards the sun and put the
acrylic glass on the lens hood. At low focal length, reflections of the background were visible in the testshots, so I
built this cone of black paper you can see. Maybe one can omit the black paper hood and put the acrylic glass directly on the lens without any hood.
I didn't try it.

Now I took an image with every lens I have (even the FF-Fisheye 10,5mm seems to work) at every focal length and every aperture.
I set the camera in "A"- mode (I preset aperture value, camera chooses speed automatically), ISO value to the lowest possible,
image size to the biggest available and image quality to JPEG, lowest compression. Set focus manually to infinite.
Creating the mask
The workflow is shown with Photoshop CS2 on a Windows-PC.
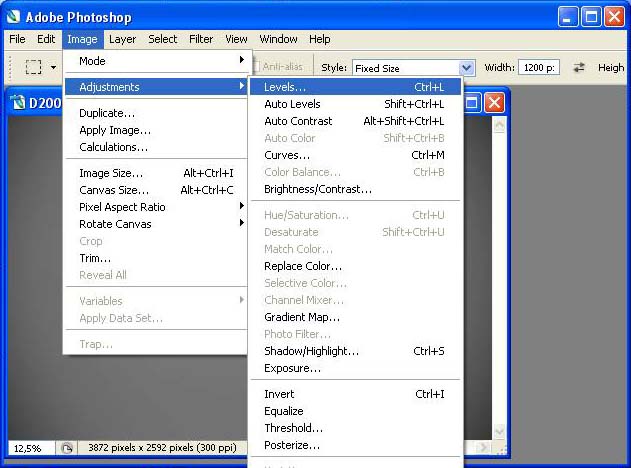
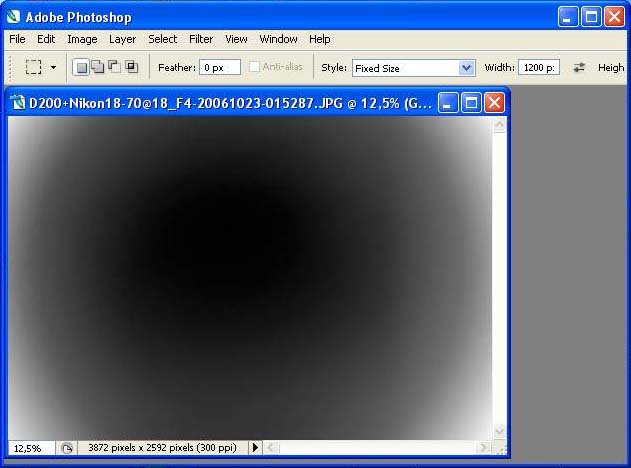
Open the testimage that fits the settings of the image you want to correct the light fall off.
For the description here, I chose a testimage taken with Nikon D200, Nikon 17-70mm lens @ 17mm, F=4.
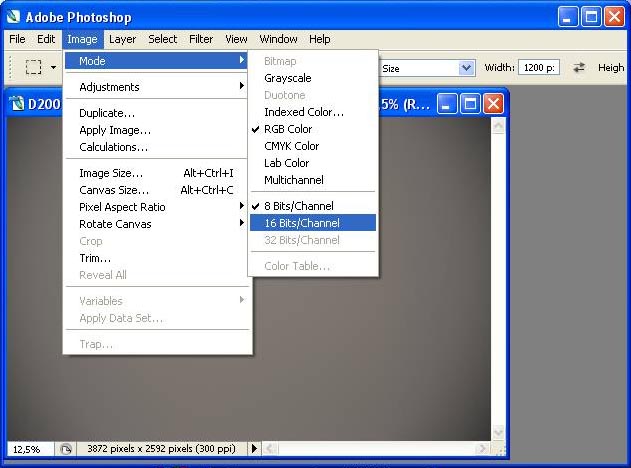
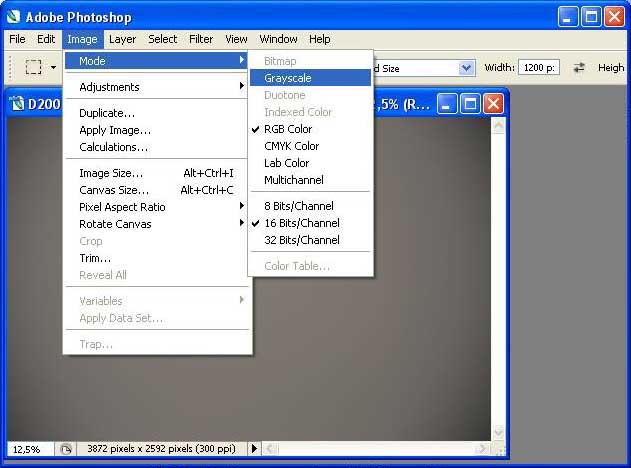
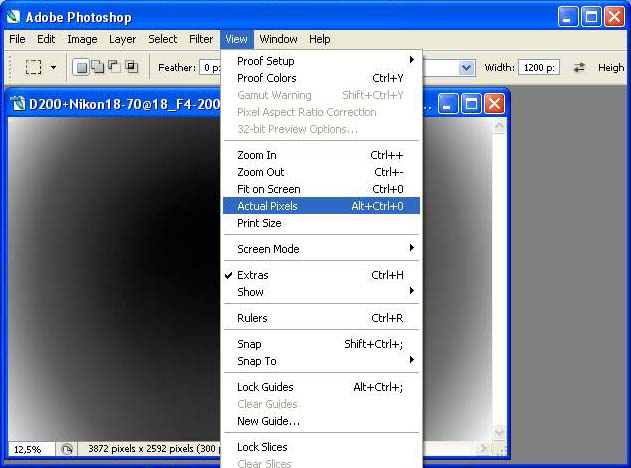
At first we convert the image into 16bit mode and grayscale:
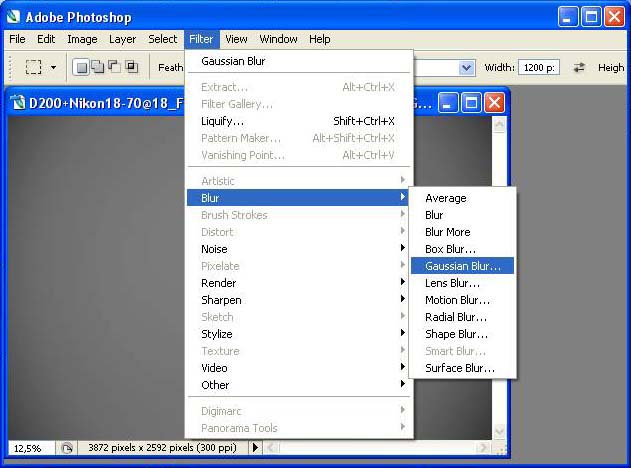
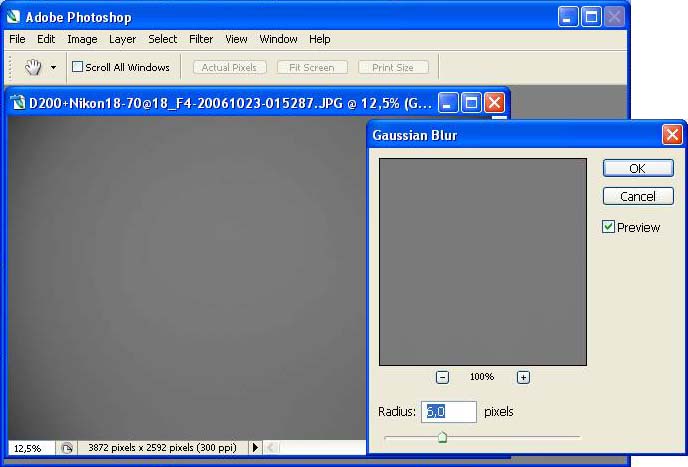
Now we apply a Gaussian Blur with a radius of about 6:
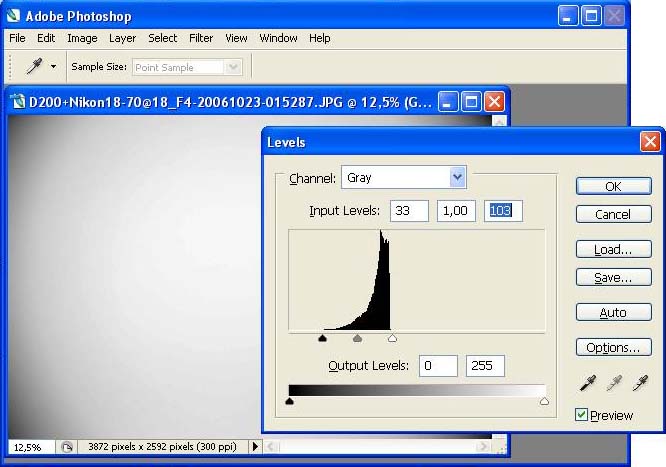
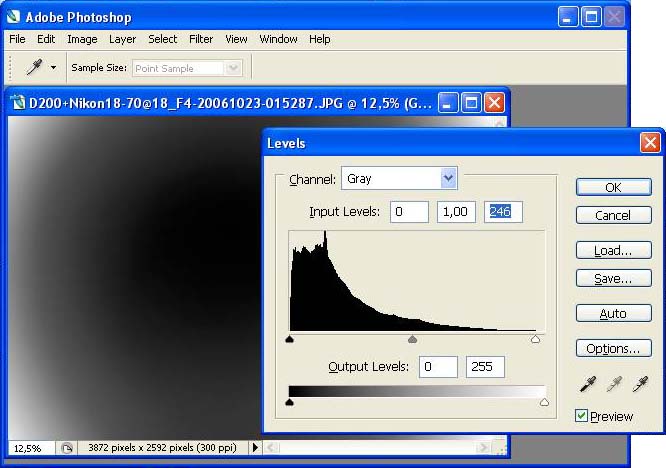
We enhance the contrast in two steps without losing any brightness information.
Set the left and right slider before the beginning and after the end of the curve:
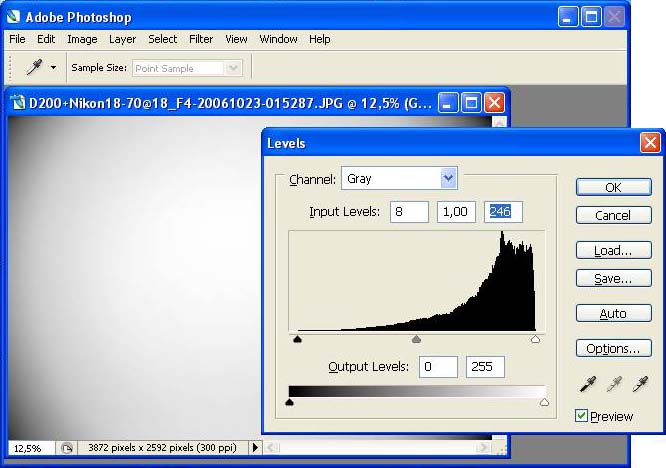
In the second step set the left and right sliders at the beginning and at the end of the curve:
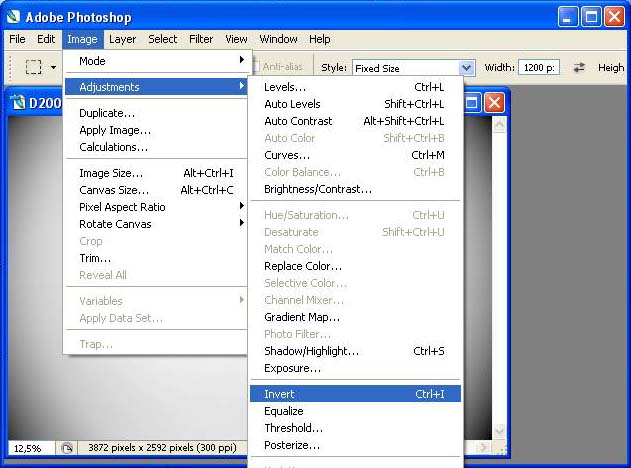
Invert the image:
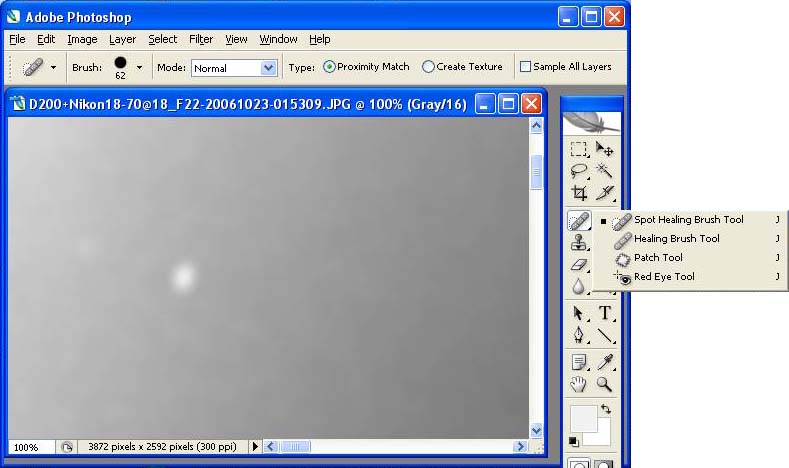
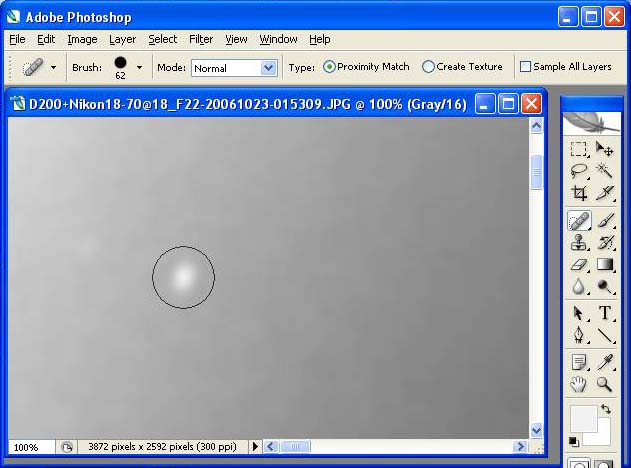
Now it is time to enlarge the image to 100% and clone out any dust specks with the spot healing brush tool:
Shrink the image again to fit the screen and apply a Gaussian Blur with radius approx. 30,
then enhance the contrast a last time:
The mask is ready now and can be saved as 16-bit TIFF.
Name it e.g. "Mask_D200_18-70@18_F4.tif".
Finding the amount of correction
Before applying correction to all images, we must determine the amount of brightness enhancement.
This often demands a little bit of trying out some values and approaching the adequate value.
The principle is to enhance the contrast of the image very strongly while trying some values.
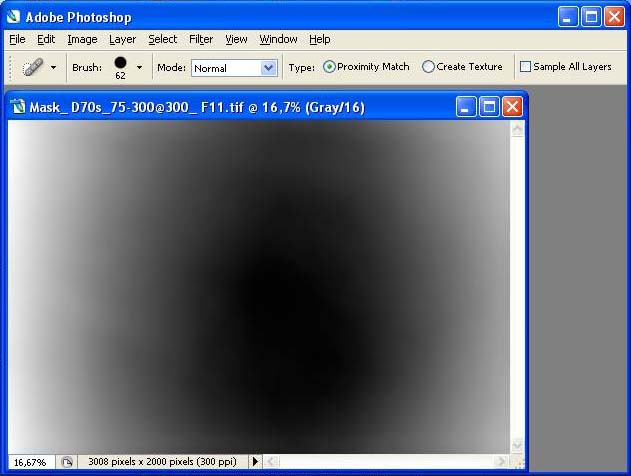
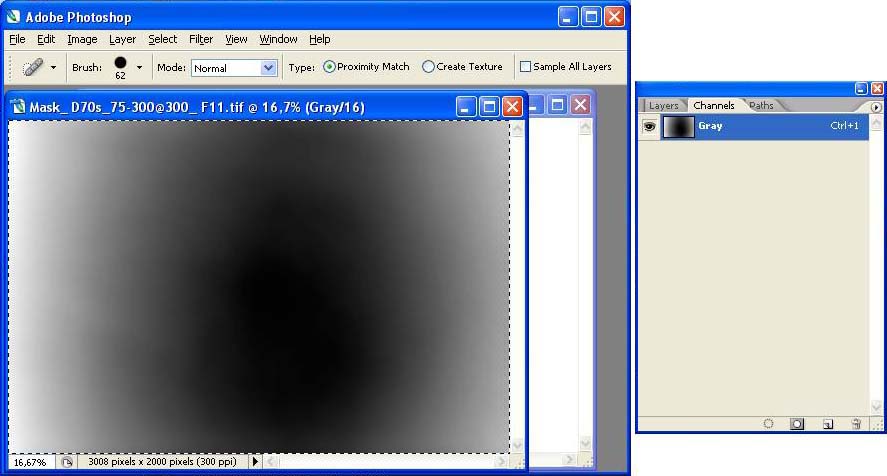
Open Photoshop, open the appropriate mask (my example mosaic was shot with Nikon D70s and Nikon lens
75-300@300mm at F11, so I open "Mask_D70s_75-300@300_F11.tif".
(If the mosaic was shot in portrait orientation, I had to rotate the mask 90° (in the right direction!))
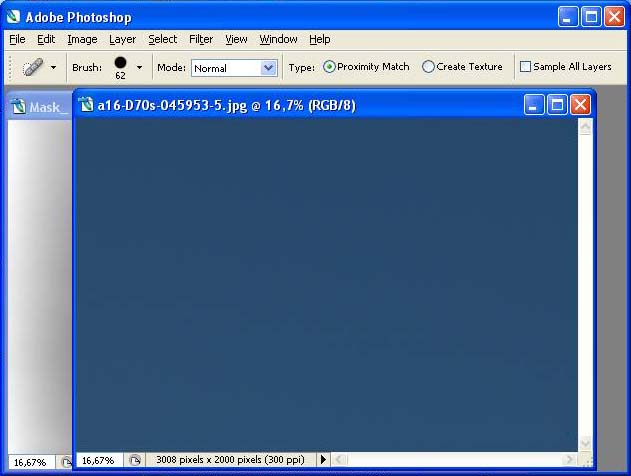
Open a representative image with a large part of uniform sky. I choose:
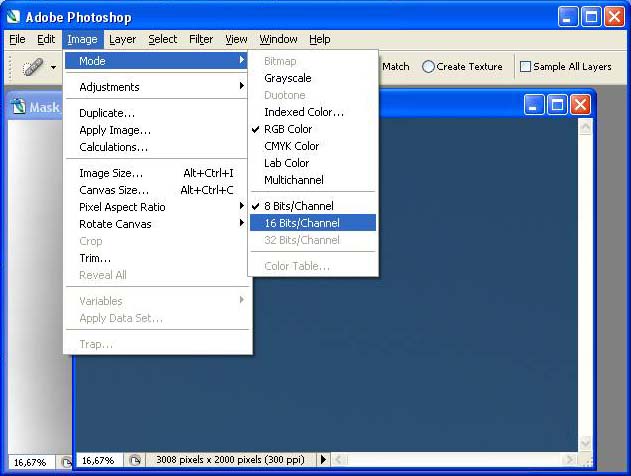
Convert the image into 16-bit mode:
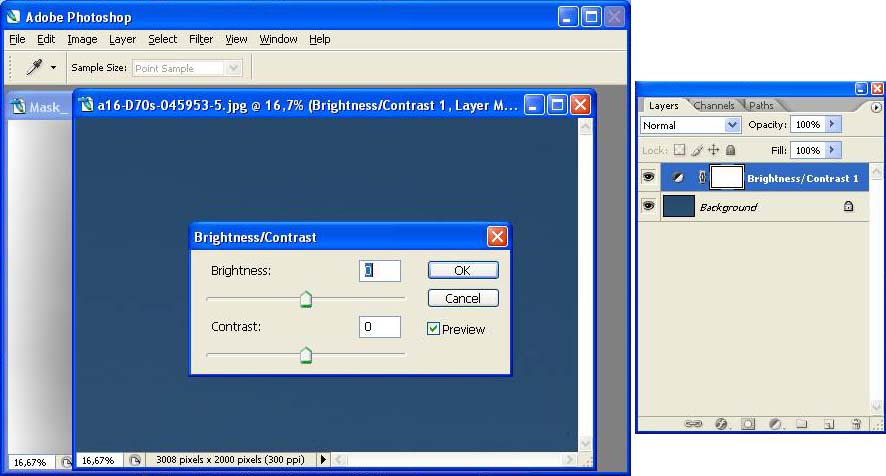
Create an adjustment layer for brightness/contrast. This will be the layer to correct vignetting:
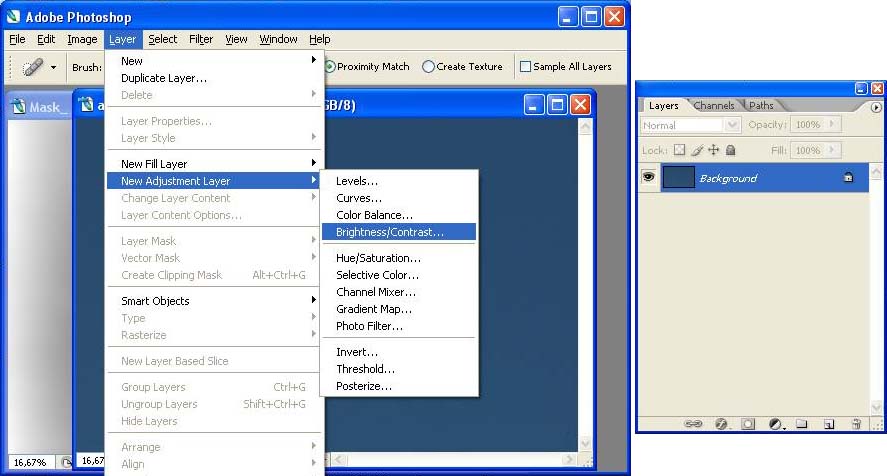
Leave the values of brightness an contrast at 0 at the moment.
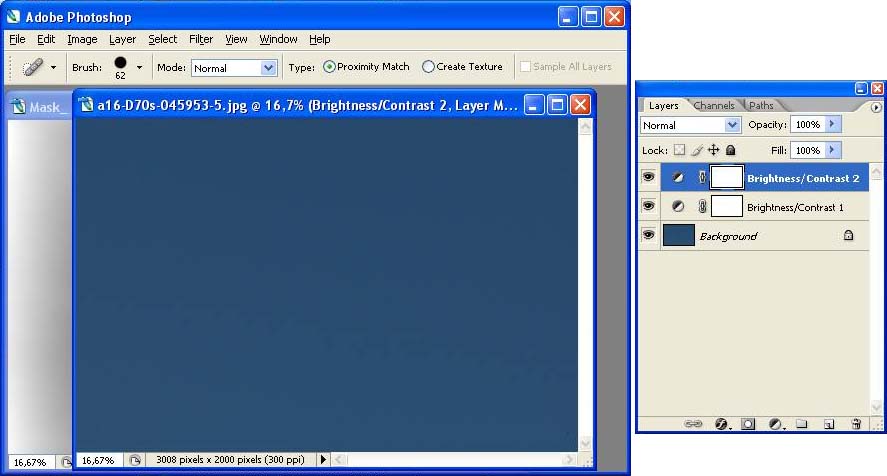
Create a second adjustment layer for brightness/contrast on top of the first:
(same procedure as before, leave the values 0).
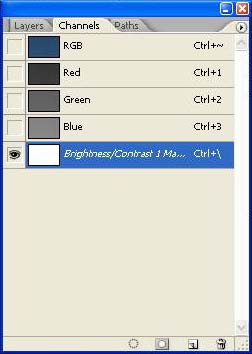
Now we insert the mask into the first adjustment layer.
Click on the white rectangle of the layer "Brightness/Contrast 1",
Click on the tab "Channels", select the eye in the last row and deselect the eye in the first row.

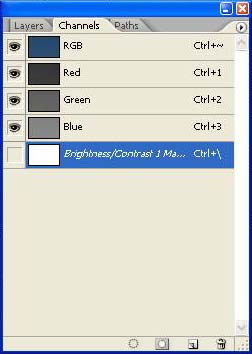
Click on the mask to bring it in the foreground. Copy the mask with [Ctrl]-[a], [Ctrl]-[c]:
Click on the image and insert the mask with [Ctrl]-[v]:
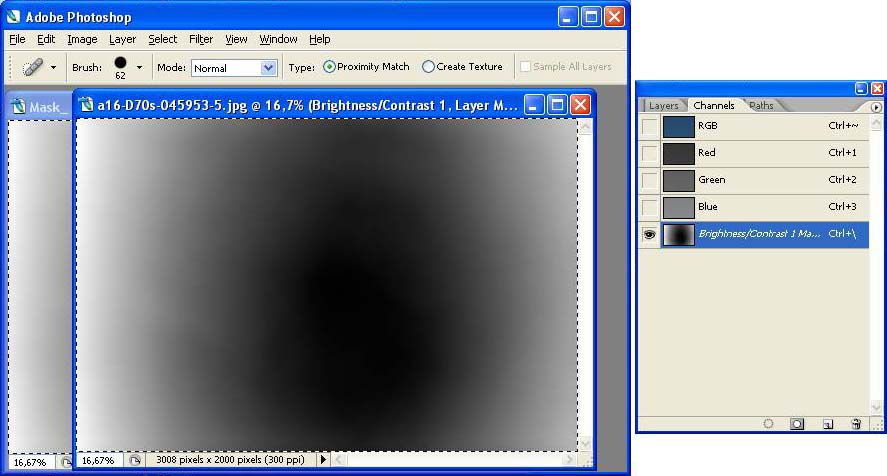
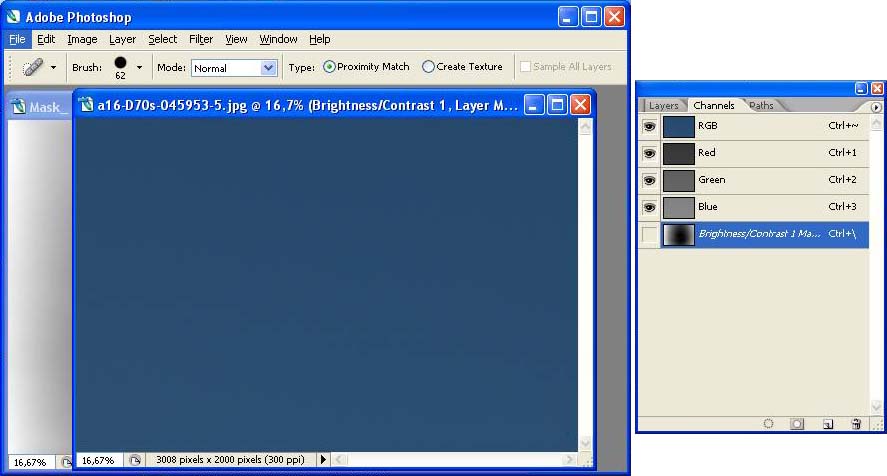
Remove the selection with [Ctrl]-[d] and select the eye of the "RGB"-channel and deselect the eye of the mask channel:
Go back to the tab "Layers", select the layer "Brightness/Contrast 2" and double click the black/white circle. Set
the value of "contrast" to 100 and the value of "brightness" to e.g. 50:
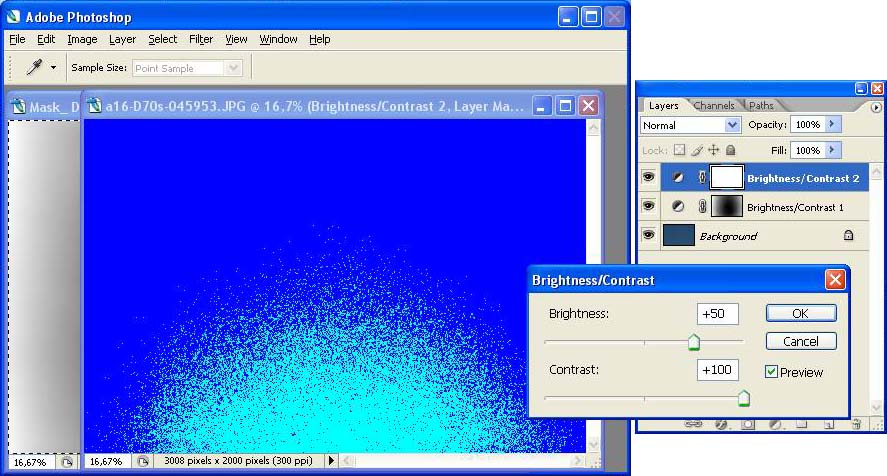
Now the vignetting is visible very obviously. Double click the black/white circle of the layer "Brightness/Contrast 1" and
adjust the slider "Brightness" until the line of constant brightness is straight.
Here the value is "+5":
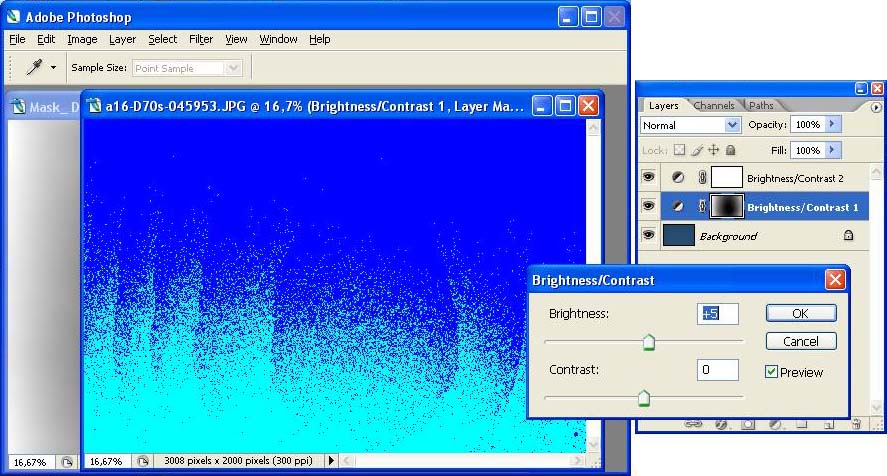
"+5" now is the value we will correct all images of the mosaic.
We can now close the test image (without saving it !!!)
This method of finding the right value for the correction not always works as demonstrated here.
Sometimes the value of contrast enhancement in the top layer must be smaller then 100,
sometimes this method fails totally. Then one must try out some values. Sorry.
Correcting vignetting
The correction process works similar to the process of finding the correction value, only the 2nd adjustment layer is omitted.
If vignetting is not too strong, I only correct vignetting of the images with regions of low structure as e.g. blue sky.
The other images I leave as they are.
It goes like this:
Start Photoshop, open the mask, copy it into the buffer with [Ctrl]-[a], [Ctrl]-[c].
Open the first image to be corrected,
convert it to 16bit,
create an adjustment layer brightness/contrast with the brightness correction value you found out in the process before (+5 in our example),
insert the mask with [Ctrl]-[v],
flatten image,
convert it to 8 bit,
save the image.
Open the next image ...
Photoshop actions
I recorded two simple photoshop actions to support this process:

The "Create mask part 1" does the first 3 steps of mask creation. The other steps of mask creation must be done manually.
The "correct vignetting" action does the process of vignetting correction.
Before starting the correction of the images, you have to change the step "Make adjustment layer" (marked yellow) with the right
amount of "Brightness". Click on the step and record it again with the right value, then delete the old one.
Applying of the action:
First open the correction mask (e.g. "Mask_D70s_75-300@300_F11.tif") and copy it into the buffer ([Ctrl]-[a], [Ctrl]-[c]),
then open all images to correct and apply the action to one image after the other.
Be sure not to overwrite your original images when saving!
Here is the link to the action file.
© Wolfgang Sti(t)ch, www.panos.at, Dec. 18th, 2006.